Wednesday, May 4, 2011

Exploding boxes for party favors at a Senior Luncheon!


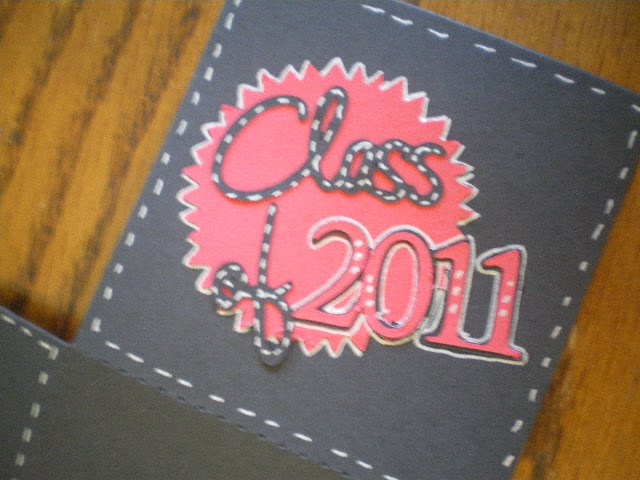
Okay so alot of pictures to view here. Anyway, so this is more of the graduation project I have been swamped with for my niece. Happy to do it but also happy to have mailed off the box with everything in it. I am hoping the girls will like the boxes. We are setting them up with a tape runner in each, with a writing pen, and I included a few embellishments. The concept was to have the girls exchange their senior pictures and I thought the exploding box would be a unique way to display and treasure. So I guess I will have to wait and see in another two weeks. Too bad I can't fly in to help my mother with hosting the luncheon.
Have a great laugh today!
Creatively yours!

Something Arrived this Monday


Okay so my daughter was also escited to help me open it up. She wanted at it first, the box that is. She could care less what was in the box unlike me. She wanted the box for her baby dolls. So the new toy is here. It took a little while to update the firmware. Not sure if the sight was overloaded or my computer was just in a funk.

So I finally got the opportunity to try it out tonight. Only 24 hours later! Watch for next few postings as I am exploring the new E2!

Tuesday, May 3, 2011

Mother's Day Gift

I have admired these scrapbooked drawers and when I realized that my plan A for mother's day gift was just not going to be finished in time, I moved on to plan b. And the only thing that took awhile on this was waiting for pictures from my in laws so that I could add the cousins.

Really quick concept and yet I used the cricut to make chipboard letters since I didn't own any big enough and it was after store hours. Even my husband commented on how neat it turned out and that his mother will really love it. I am working on something different for my mom and need to finish it so it can also get mailed.


Monday, May 2, 2011

Project from Teresa Collins Class at the Dallas Stampede

Teresa Collins class at the Dallas Stampede with Cricut Circle in March.
We got to see hands on some of the great things on the Imagine Baby Boutique Cartridge. Fabulous is what sums up the images on there.

This is the project from the class along with learning how to bring more interest to flowers cut out on the cricut. There are other pages inside both combined with images from the cartridge and her paper line.

One of my flowers that I worked with in the class. Love the paper and the embellishment.

Enjoy!

Saturday, April 30, 2011

Something that my son wears once a week!


I made this for one of my sons that has been taking karate for two years. I wanted to give the Car Decals cartridge from Cricut a try and this is what I came up with. A while back I had seen Karlee on Karlee's Krafts do this for her kids on her blog site, high recommend checking her out! I located the fabric at Hobby Lobby by the way it can be found on the isle where you would look for iron on letters for shirts and atheltic wear. It comes in a few patterns, its already pre loaded with stabilizer and iron on adheasive for fabric. Just place the paper side down on the cutting mat. And remember to flip your image if you have letters or words involved other wise it won't read after you iron it on. I thought I would have to use multi cut but I just made sure I had a fresh blade in. I am ready for this company to come out with more pattern choices! Enjoy!

Birthday Invitations for my sweet almost 4 daughter!

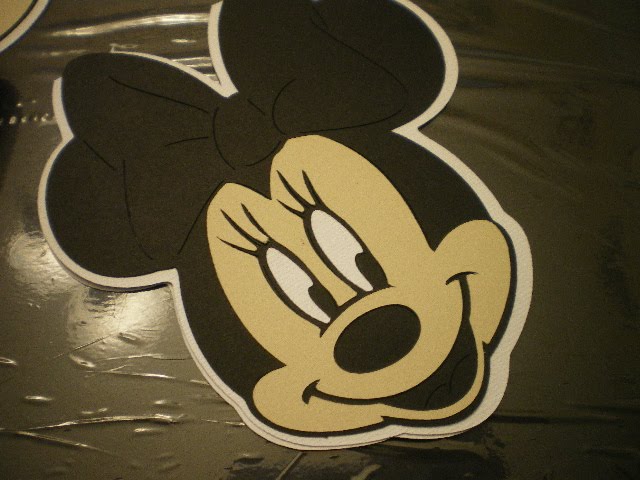
Okay So my daughter picked out a minnie mouse party. Is it fitting that we are having it at chuck e cheese??? Another piece of info, my first job in highschool was at chuck e cheese and yes I was sometimes the rat!


I took step by step photos. I loved seeing the invitations coming to life after each layer added.


If you haven't figured this out yet. I created a card on my gypsy. At first I tried to do it off of one end of her bow. But that did not work. I had to straighten minnie and then copy her and flip her upside down. Then I linked her together by the bow.


I tried one smaller and it was just too small to use a stamp to put all the generic invite info on the inside.


I am making shirts with the yudu for party favors. The boys with a black out of Mickey and girls a black out with Minnie with hopes of adding a pink bow layer.


Something I saw and loved off of another blog was using white paper and cutting layers and using markers to fill in the needed color. So I took this and used it here. Why create another step and cut all the eyes and tongue on white too. After it cut, I then used a red bic marker and colored it in. After which then I assembled.


Hope you enjoyed. I am learning and creating more with my cricut. And awaiting the arrival of E2, which is looking like it will arrive Monday May 2. Yeah!

Tuesday, April 26, 2011

Easter goodies for my Daughter's Preschool Class


Made little chicks from the Simply Charmed cartridge and then used the Peachy Keen stamps for the little eyes. Much more personality. I put each of the kids names on it and then added them to the baskets.


Made little Easter baskets for the kids and filled them with special goodies.


The total came to I believe waas 14 baskets.


I also made ceramic eggs with each child's name on them. Painted and glazed them. I know this was more for the parents then the child.

Happy Tuesday!